
Tutorial
Microsoft To Do Tutorial: How to Get Started
Microsoft To Do Tutorial: How to Get Started

Microsoft To Do Tutorial: How to Get Started
Microsoft To Do is a free task manager that ships with every Microsoft account. At first glance it looks simple. It is. But there is a specific way to set it up that makes it genuinely useful, and a lot of people skip the steps that make the difference between a task app that gets ignored and one that actually drives your day.
This tutorial walks through the core features in order of how much they matter: creating lists, using My Day, setting reminders, connecting Outlook, sharing lists with others, and building subtask structures for more complex work. If you are new to Microsoft To Do or have been using it casually without a system, this covers everything you need to get real value out of it.
Key Takeaways
The My Day feature is the most underused part of Microsoft To Do. It is where the app becomes a daily planning tool rather than just a list.
Outlook integration turns flagged emails into tasks automatically, making To Do useful even if you are not disciplined about manually adding tasks.
Microsoft To Do is free for everyone. You do not need a Microsoft 365 subscription to use the full feature set.
Step 1: Create Your First Lists
Microsoft To Do organizes tasks into lists. The app comes with a set of default smart lists: My Day, Important, Planned (tasks with due dates), Assigned to Me (tasks from Planner), and Tasks (your general inbox). You can also create custom lists for any category you want.
To create a list: open To Do on web, iOS, Android, or Windows, click or tap New List in the left sidebar, and give it a name. Good starter lists are Work, Personal, Errands, and Waiting For. Avoid creating too many lists at the start. Five or fewer works better than twenty. Task apps get abandoned when categorization becomes a burden rather than a tool.
Tasks you are not sure where to put go into Tasks (the default inbox list). You can sort them into proper lists later during a weekly review. The inbox approach keeps capture fast and friction-free.
Step 2: Add Tasks with Due Dates and Reminders
To add a task to any list, click or tap the input box at the top and type the task name. After creating it, open the task to add more detail.
The most important fields to fill in:
Due date: Sets when the task needs to be done. Tasks with due dates appear in the Planned smart list sorted by date.
Reminder: A notification at a specific time. Separate from the due date. Use this when you need a nudge to do something at a specific moment, not just on a specific day.
Repeat: Makes the task recur daily, weekly, monthly, or on custom intervals. Useful for recurring obligations that otherwise get forgotten.
Notes: Free-text field for context, links, or instructions attached to the task.
A task with just a name is easy to procrastinate. A task with a due date and a reminder has a time commitment. The act of assigning these forces you to decide when something will actually happen rather than leaving it as a vague "someday."
Step 3: Use My Day for Daily Planning
My Day is the most important feature in Microsoft To Do. It is a fresh view each morning that shows an empty slate. You manually add tasks to it each day, choosing from your lists or from suggestions the app surfaces based on due dates, overdue tasks, and recently added items.
The ritual matters. Spending 2-3 minutes each morning opening My Day and picking 3-5 tasks to focus on that day creates a daily commitment that a flat task list cannot. Tasks added to My Day disappear from it at midnight, resetting the view for the next day. This prevents the list from accumulating indefinitely into an overwhelming backlog.
Use My Day as your answer to "what am I doing today?" rather than scrolling through every list. This is the same kind of daily prioritization that more complex systems like time-blocking encourage, but with a minimal interface. For people who struggle with task paralysis or executive dysfunction, the My Day daily commit is one of the most accessible ways to build a consistent planning habit.
Step 4: Connect Microsoft To Do to Outlook
The Outlook integration is what separates To Do from other simple task apps for anyone who lives in email. When you flag an email in Outlook, it automatically creates a task in Microsoft To Do's Flagged Email smart list. When you unflag the email or mark the task complete, both sync.
This integration turns your inbox into a task capture tool. Instead of maintaining a separate system for work-related tasks, you flag the emails that need action and they appear in To Do automatically. The flagged email task links back to the original email, so context is never lost.
To verify the integration is active: in Outlook web or desktop, flag any email. Open Microsoft To Do and check the Flagged Email list in the left sidebar. The email should appear as a task within seconds. If it does not appear, sign out of both apps, sign back in with the same Microsoft account, and try again. Sync issues between Microsoft 365 apps often trace back to account session problems, similar to the Teams calendar sync issues that affect the same Microsoft 365 backend.
Step 5: Add Subtasks for Complex Work
Microsoft To Do supports subtasks, called Steps, inside any task. Open a task and tap Add step to create a checklist underneath the main task item.
Use Steps when a task has multiple discrete actions that need to happen in sequence. A task called "Prepare quarterly report" might have steps like: pull data from CRM, write summary, format slides, send to manager. Breaking it down makes the task feel less like a monolith and gives you a progress indicator as steps get checked off.
Steps do not have their own due dates or reminders. If the sub-items need individual deadlines, they should be separate tasks rather than steps. The step feature is for checklists within a single deliverable, not for multi-day project phases.
Step 6: Share Lists with Collaborators
Microsoft To Do allows you to share any custom list with other Microsoft account users. Open the list, click the person icon or Sharing options, and send an invite via email or link. Shared list members can add, edit, and complete tasks on the list. Tasks can be assigned to specific members within a shared list.
Shared lists in To Do are designed for lightweight household or small-team coordination, not project management. For tracking work across a team with board views, assignment tracking, and workload visibility, that is what Microsoft Planner is for. The two tools handle different scales of collaboration, and understanding which one fits a given need saves time.
Step 7: Use the Mobile Apps for Capture on the Go
Microsoft To Do's iOS and Android apps are well-designed and fast. The key behavior to build is using To Do as your capture tool whenever a task occurs to you away from your desk. The app opens instantly and adding a task takes under 10 seconds.
The widget feature on iOS and Android lets you see your My Day list directly from your home screen without opening the app. This makes it easier to reference your day's tasks at a glance and check things off without opening a full app session. Set up a To Do widget showing My Day as your first step after installing the mobile app.
Best Tool for Scheduling the Tasks You Capture in To Do
Microsoft To Do is excellent at capturing and organizing what needs to get done. What it does not do is help you decide when to do each task based on your energy and calendar reality. Most people end up with a full My Day list and no real plan for how to fit it all in around meetings.
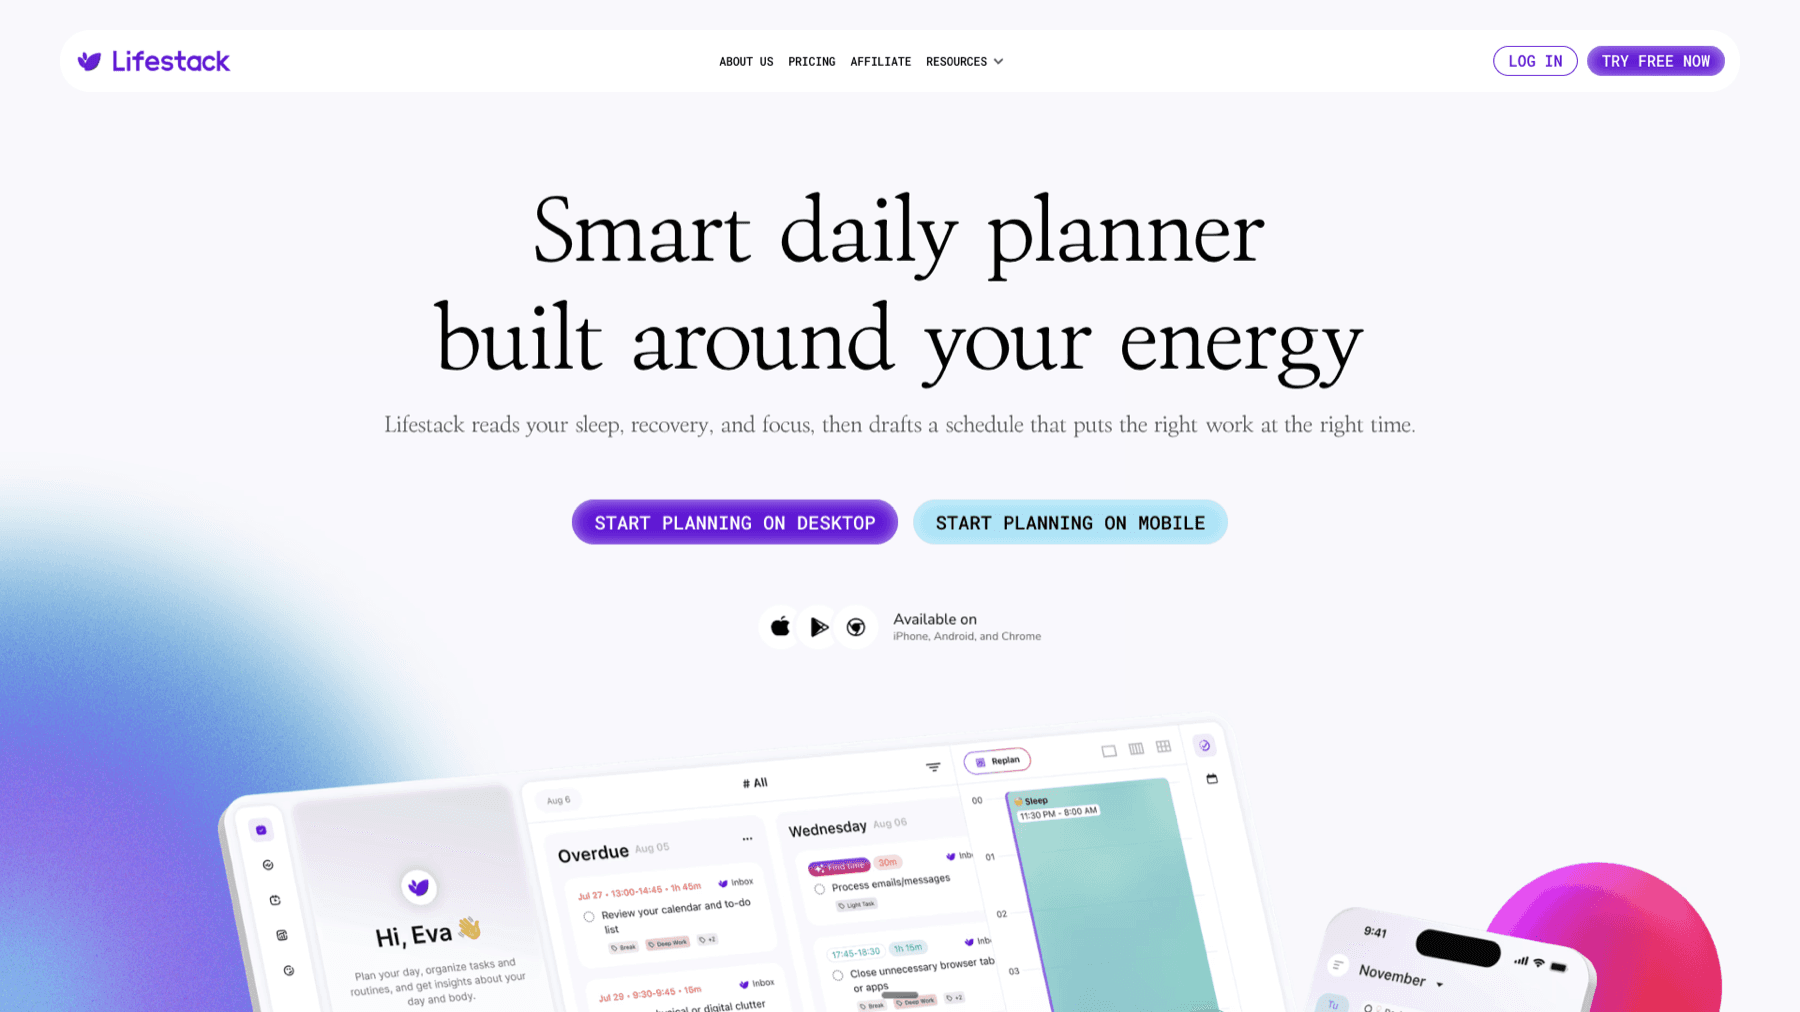
Lifestack is an AI scheduling app that takes your tasks and schedules them against your natural energy patterns, protecting deep work for high-focus hours and fitting lighter tasks into the gaps. It syncs with Outlook and Google Calendar and works on iOS and Android. If you pair To Do for capture and Lifestack for scheduling, you get the full pipeline from "this needs to get done" to "here is when it will happen."
For more on building schedules around variable energy and focus, see the guide on task management apps for inconsistent energy levels and the time management strategies guide. Lifestack is $9.99/month, $49.99/year (7-day free trial), or $120 lifetime.
Frequently Asked Questions
Is Microsoft To Do free?
Yes. Microsoft To Do is completely free for everyone with a Microsoft account. No Microsoft 365 subscription is required. The full feature set including My Day, reminders, shared lists, and Outlook sync is available at no cost.
How do I sync Microsoft To Do with Outlook?
The sync happens automatically when both apps use the same Microsoft account. Flag an email in Outlook to create a task in To Do's Flagged Email list. Tasks you create in To Do with due dates also appear in your Outlook task list. No manual setup is required beyond using the same account.
What is the difference between Tasks and My Day in Microsoft To Do?
Tasks is your default inbox list where all new tasks land unless added to a specific list. My Day is a daily planning view where you manually choose which tasks to focus on today. Tasks are permanent until completed or deleted. My Day resets every night. Use Tasks as a capture inbox and My Day as your daily work session planner.
Can I use Microsoft To Do for team projects?
Microsoft To Do supports shared lists with basic task assignment, which works for simple household or small group coordination. For team projects with Kanban boards, workload views, and progress tracking, use Microsoft Planner instead. See the full breakdown in the Microsoft To Do vs Planner guide.
How do I create recurring tasks in Microsoft To Do?
Open any task, tap the due date, and then tap Repeat. Set the recurrence to daily, weekly, monthly, yearly, or a custom interval. When you complete a recurring task, the next occurrence is automatically created with the next due date.
Microsoft To Do Tutorial: How to Get Started
Microsoft To Do is a free task manager that ships with every Microsoft account. At first glance it looks simple. It is. But there is a specific way to set it up that makes it genuinely useful, and a lot of people skip the steps that make the difference between a task app that gets ignored and one that actually drives your day.
This tutorial walks through the core features in order of how much they matter: creating lists, using My Day, setting reminders, connecting Outlook, sharing lists with others, and building subtask structures for more complex work. If you are new to Microsoft To Do or have been using it casually without a system, this covers everything you need to get real value out of it.
Key Takeaways
The My Day feature is the most underused part of Microsoft To Do. It is where the app becomes a daily planning tool rather than just a list.
Outlook integration turns flagged emails into tasks automatically, making To Do useful even if you are not disciplined about manually adding tasks.
Microsoft To Do is free for everyone. You do not need a Microsoft 365 subscription to use the full feature set.
Step 1: Create Your First Lists
Microsoft To Do organizes tasks into lists. The app comes with a set of default smart lists: My Day, Important, Planned (tasks with due dates), Assigned to Me (tasks from Planner), and Tasks (your general inbox). You can also create custom lists for any category you want.
To create a list: open To Do on web, iOS, Android, or Windows, click or tap New List in the left sidebar, and give it a name. Good starter lists are Work, Personal, Errands, and Waiting For. Avoid creating too many lists at the start. Five or fewer works better than twenty. Task apps get abandoned when categorization becomes a burden rather than a tool.
Tasks you are not sure where to put go into Tasks (the default inbox list). You can sort them into proper lists later during a weekly review. The inbox approach keeps capture fast and friction-free.
Step 2: Add Tasks with Due Dates and Reminders
To add a task to any list, click or tap the input box at the top and type the task name. After creating it, open the task to add more detail.
The most important fields to fill in:
Due date: Sets when the task needs to be done. Tasks with due dates appear in the Planned smart list sorted by date.
Reminder: A notification at a specific time. Separate from the due date. Use this when you need a nudge to do something at a specific moment, not just on a specific day.
Repeat: Makes the task recur daily, weekly, monthly, or on custom intervals. Useful for recurring obligations that otherwise get forgotten.
Notes: Free-text field for context, links, or instructions attached to the task.
A task with just a name is easy to procrastinate. A task with a due date and a reminder has a time commitment. The act of assigning these forces you to decide when something will actually happen rather than leaving it as a vague "someday."
Step 3: Use My Day for Daily Planning
My Day is the most important feature in Microsoft To Do. It is a fresh view each morning that shows an empty slate. You manually add tasks to it each day, choosing from your lists or from suggestions the app surfaces based on due dates, overdue tasks, and recently added items.
The ritual matters. Spending 2-3 minutes each morning opening My Day and picking 3-5 tasks to focus on that day creates a daily commitment that a flat task list cannot. Tasks added to My Day disappear from it at midnight, resetting the view for the next day. This prevents the list from accumulating indefinitely into an overwhelming backlog.
Use My Day as your answer to "what am I doing today?" rather than scrolling through every list. This is the same kind of daily prioritization that more complex systems like time-blocking encourage, but with a minimal interface. For people who struggle with task paralysis or executive dysfunction, the My Day daily commit is one of the most accessible ways to build a consistent planning habit.
Step 4: Connect Microsoft To Do to Outlook
The Outlook integration is what separates To Do from other simple task apps for anyone who lives in email. When you flag an email in Outlook, it automatically creates a task in Microsoft To Do's Flagged Email smart list. When you unflag the email or mark the task complete, both sync.
This integration turns your inbox into a task capture tool. Instead of maintaining a separate system for work-related tasks, you flag the emails that need action and they appear in To Do automatically. The flagged email task links back to the original email, so context is never lost.
To verify the integration is active: in Outlook web or desktop, flag any email. Open Microsoft To Do and check the Flagged Email list in the left sidebar. The email should appear as a task within seconds. If it does not appear, sign out of both apps, sign back in with the same Microsoft account, and try again. Sync issues between Microsoft 365 apps often trace back to account session problems, similar to the Teams calendar sync issues that affect the same Microsoft 365 backend.
Step 5: Add Subtasks for Complex Work
Microsoft To Do supports subtasks, called Steps, inside any task. Open a task and tap Add step to create a checklist underneath the main task item.
Use Steps when a task has multiple discrete actions that need to happen in sequence. A task called "Prepare quarterly report" might have steps like: pull data from CRM, write summary, format slides, send to manager. Breaking it down makes the task feel less like a monolith and gives you a progress indicator as steps get checked off.
Steps do not have their own due dates or reminders. If the sub-items need individual deadlines, they should be separate tasks rather than steps. The step feature is for checklists within a single deliverable, not for multi-day project phases.
Step 6: Share Lists with Collaborators
Microsoft To Do allows you to share any custom list with other Microsoft account users. Open the list, click the person icon or Sharing options, and send an invite via email or link. Shared list members can add, edit, and complete tasks on the list. Tasks can be assigned to specific members within a shared list.
Shared lists in To Do are designed for lightweight household or small-team coordination, not project management. For tracking work across a team with board views, assignment tracking, and workload visibility, that is what Microsoft Planner is for. The two tools handle different scales of collaboration, and understanding which one fits a given need saves time.
Step 7: Use the Mobile Apps for Capture on the Go
Microsoft To Do's iOS and Android apps are well-designed and fast. The key behavior to build is using To Do as your capture tool whenever a task occurs to you away from your desk. The app opens instantly and adding a task takes under 10 seconds.
The widget feature on iOS and Android lets you see your My Day list directly from your home screen without opening the app. This makes it easier to reference your day's tasks at a glance and check things off without opening a full app session. Set up a To Do widget showing My Day as your first step after installing the mobile app.
Best Tool for Scheduling the Tasks You Capture in To Do
Microsoft To Do is excellent at capturing and organizing what needs to get done. What it does not do is help you decide when to do each task based on your energy and calendar reality. Most people end up with a full My Day list and no real plan for how to fit it all in around meetings.
Lifestack is an AI scheduling app that takes your tasks and schedules them against your natural energy patterns, protecting deep work for high-focus hours and fitting lighter tasks into the gaps. It syncs with Outlook and Google Calendar and works on iOS and Android. If you pair To Do for capture and Lifestack for scheduling, you get the full pipeline from "this needs to get done" to "here is when it will happen."
For more on building schedules around variable energy and focus, see the guide on task management apps for inconsistent energy levels and the time management strategies guide. Lifestack is $9.99/month, $49.99/year (7-day free trial), or $120 lifetime.
Frequently Asked Questions
Is Microsoft To Do free?
Yes. Microsoft To Do is completely free for everyone with a Microsoft account. No Microsoft 365 subscription is required. The full feature set including My Day, reminders, shared lists, and Outlook sync is available at no cost.
How do I sync Microsoft To Do with Outlook?
The sync happens automatically when both apps use the same Microsoft account. Flag an email in Outlook to create a task in To Do's Flagged Email list. Tasks you create in To Do with due dates also appear in your Outlook task list. No manual setup is required beyond using the same account.
What is the difference between Tasks and My Day in Microsoft To Do?
Tasks is your default inbox list where all new tasks land unless added to a specific list. My Day is a daily planning view where you manually choose which tasks to focus on today. Tasks are permanent until completed or deleted. My Day resets every night. Use Tasks as a capture inbox and My Day as your daily work session planner.
Can I use Microsoft To Do for team projects?
Microsoft To Do supports shared lists with basic task assignment, which works for simple household or small group coordination. For team projects with Kanban boards, workload views, and progress tracking, use Microsoft Planner instead. See the full breakdown in the Microsoft To Do vs Planner guide.
How do I create recurring tasks in Microsoft To Do?
Open any task, tap the due date, and then tap Repeat. Set the recurrence to daily, weekly, monthly, yearly, or a custom interval. When you complete a recurring task, the next occurrence is automatically created with the next due date.



FOLLOW ON
FOLLOW ON
FOLLOW ON



Copyright 2026 © Lifestack. All rights reserved
Copyright 2026 © Lifestack. All rights reserved

